Knowledge Base
Setting Up Custom Fields
Capturing custom data
With the Custom Fields feature, you can create extra input fields to capture data from attendees.
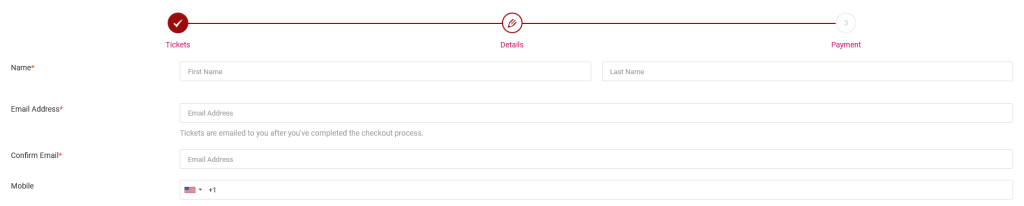
These input fields are displayed on the page where attendees enter information while booking their tickets.
Setting up custom fields
To set the Custom Fields up, go to the Events page, find the event on the table, then go to Actions > Edit Event > Edit Tickets Page.
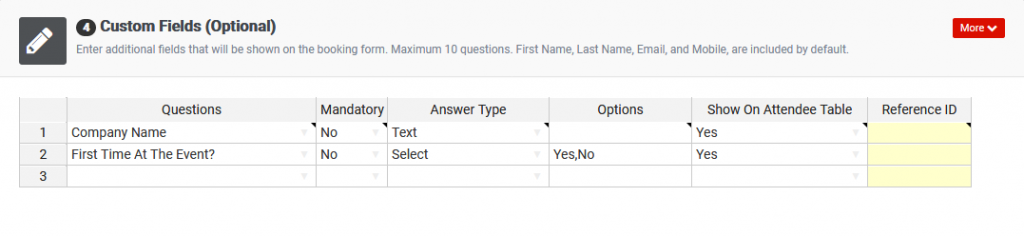
On the new page, scroll down to the Custom Fields section, then enter the questions you want the platform to ask.
Description of the fields
- Questions – enter what the app should ask.
- Mandatory – if set to Yes, the Question must be answered.
- Answer Type – the choice made here determines how the answer to the question is presented. See below.
- Options – this is relevant if the Answer Type requires it.
- Show On Attendee Table – if set to Yes, what was captured will be shown on the Attendees page.
All captured data can be exported to CSV files.
Answer Types
| Answer Type | Description |
|---|---|
| Text | Use this for short descriptions. |
| Long Text | Use this for long descriptions. |
| Multiple Options | Use this where one or more choices need to be selected. The choices will be presented as checkboxes. In the Options section, enter comma-separated values for each of the choices. |
| Select | Use this for dropdown menus. In the Options section, enter comma-separated values, for each option that can be selected. By default, the first comma-separated value will be selected on the dropdown. If that is not desired, you can set the very first character as a comma instead. |
| Autocomplete | Use this for dropdown menus where suggestions are made as one types. In the Options section, enter comma-separated values, for each option that can be selected. |
| Use this for email addresses only. | |
| Numeric | Use this for numbers only. |
| Date | Use this to capture dates only. |
| Time | Use this to capture time only. |
| Radio | Use this where one choice need to be selected from multiple choices. The choices will be presented as radios. In the Options section, enter comma-separated values for each of the choices. |
| Consent Checkbox | Use this to display a non-mandatory checkbox, for example to capture marketing preference. If the user checks the box, the answer will be displayed as “Yes”. In the Options section, enter what they’re consenting to. |
| Single Checkbox | Use this to display a non-mandatory checkbox. If the user checks the box, the answer will be what you have set in the Options section. |
| Access Code Sheet | Use this to force the user to enter an access code before proceeding with the ticket booking process. The access code are hard-coded in the Options section. See below. |
| Access Code Remote | Use this to force the user to enter an access code (e.g membership ID numbers, etc) before proceeding with the ticket booking process. The access code are dynamic and come from a Google Spreadsheet. See below. |
Access Codes
You can set up a custom field that forces a user to enter a valid code before they’re allowed to book a ticket.
The code acts like a password that grants access to a limited feature.
When a user fills out their details when booking a ticket, they would be prompted to enter the access code.

You would need to specify what those valid codes are in your account.
There are two ways of doing so. The codes can either be specified as comma-separated values, or from a remote CSV file.
Access Codes From CSV Files
This feature only works when using Google Sheets as the source of the data.
Note – the app will continually check for changes in the Google Sheets spreadsheet.
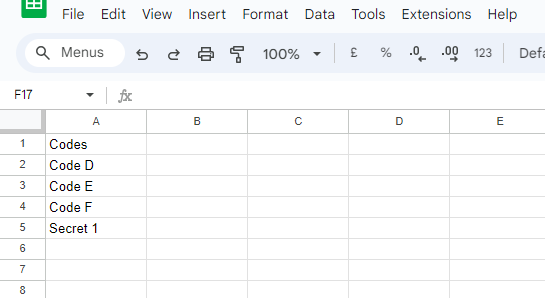
Open a new Google Sheet file.
In cell A1, ensure that it has a title named Codes.
In the other subsequent cells, enter the access codes you want.
After that, go to File > Share > Publish To The Web.
In the prompt that then appears, select the Link tab.
Select the sheet’s name, e.g. Sheet 1, then select Comma-separated Values (.csv).
Under the Published content and settings, choose the name of the sheet, then check the box Automatically republish when changes are made.
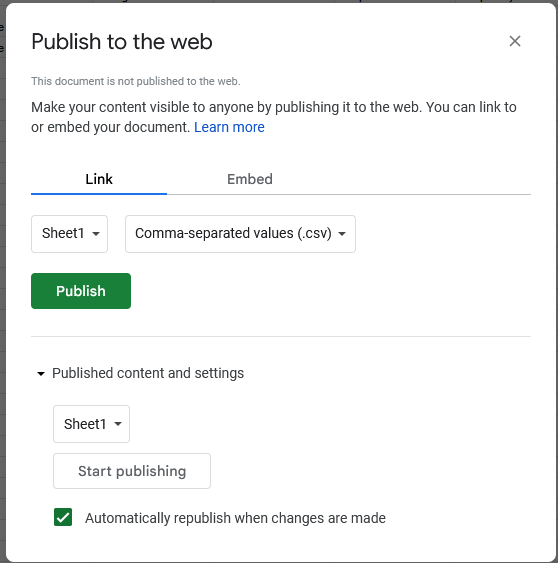
Click on the Publish button, then copy the share URL provided.
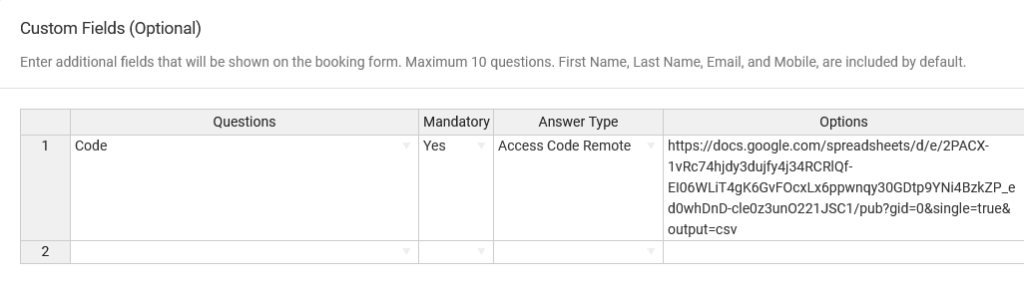
Back in your account, go to the Custom Fields section.
Under the Answer Type column, choose Access Code Remote.
Under the Options column, enter the Google Sheets URL that you copied.
Under the Questions column, enter any value that the user should be prompted with.
Access Codes From Comma-separated Values
Go to the Custom Fields section.
Under the Answer Type column, choose Access Code Sheet.
Under the Options column, enter comma-separated values that comprise the access codes.
Under the Questions column, enter any value that the user should be prompted with.
