Knowledge Base
Event Privileges Validation
Overview
The same tickets used to admit an attendee to an event can also be used to grant access to an event’s privileges.
Validating the tickets
After the ticket validation has occurred, the privileges offered will be shown to the person doing the validation, where he or she can take the required action.
Tickets can be validated via smartphone apps, the web app or the Windows desktop app.
Validation via smartphone apps
Our Android or iOS apps can be used to validate event privileges online or offline.
To do so, log in using your account’s email address and password.
If you have a team, create Smartphone App user accounts for them to log in with.
Scanning QR codes
Once logged in, choose the event.
On the subsequent screen, choose the event’s date, then tap on Special Access or Event Privileges.
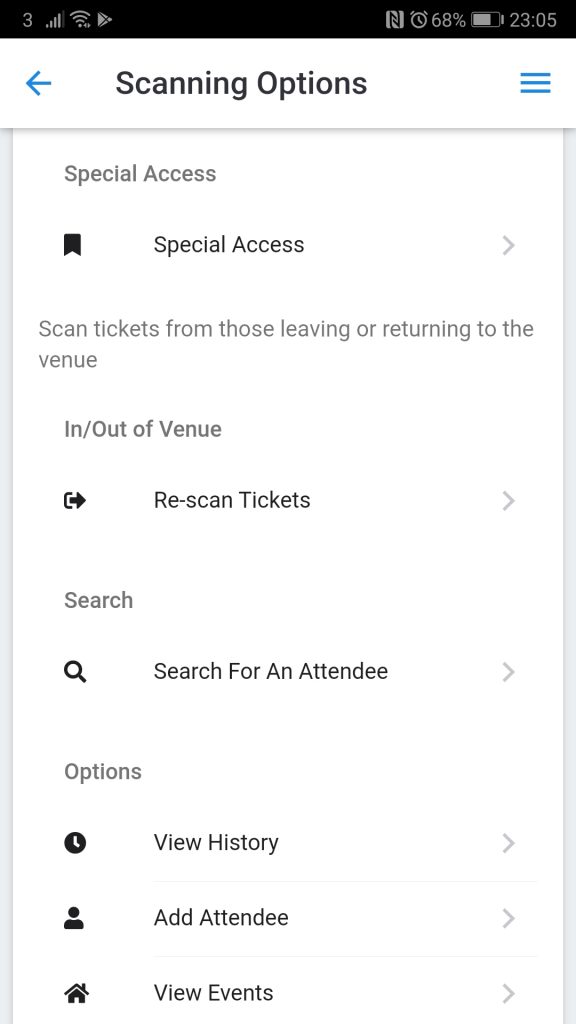
On the screen that follows that, choose the event privilege then scan the attendee’s QR code ticket.
Using Redemption Codes
Redemption codes are random numbers the platform generates when attendees request it from their accounts or tickets.
Once logged in, choose the event.
On the subsequent page, choose the event’s date then scroll to Redemption Codes.
Tap on Event Privileges Validation.
On the next screen, choose the name of the privilege, then enter an attendee’s redemption code, and finally tap on the Validate button.
Validation via the web app
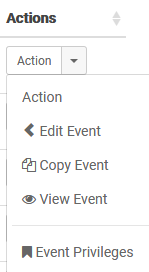
From the Events page, on the table go to Actions > Event Privileges.
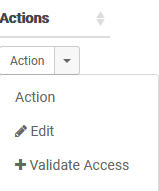
On the Event Privileges page, on the table, choose the correct privilege, then go to Actions > Validate Access.
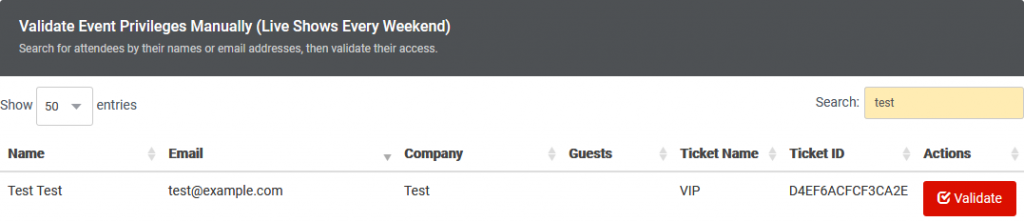
On the new page, select the event, then use the search functionality on the table to search for the attendee or ticket.
Using redemption codes
You can also validate redemption codes from attendees. Redemption codes are random numbers the platform generates when attendees request it from their accounts or tickets.
To use a redemption code, click on the Redemption Code button, then enter the code from the attendee.
Once submitted, the table will be filtered to show who the code belongs to. After that, click on the Validate button.
Using webcams
QR codes on the tickets can be scanned using webcams.
To scan the QR code using a webcam, click on the Webcam Scanning button.
On the prompt that gets displayed, choose the webcam under Video Source, then click on the Start Scanning button.
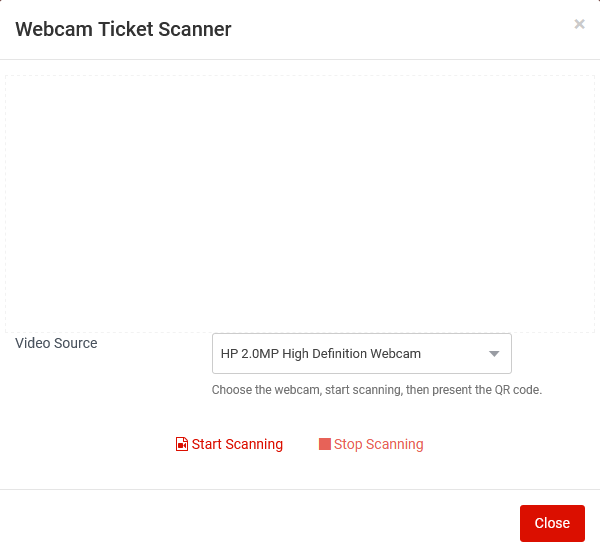
After that, accept the browser’s permission, then present an attendee’s QR code once the video can be seen.
When a QR code has been detected, the table will be filtered to show who the ticket belongs to. If a result is found, click on the Validate button to validate the ticket.
Using Bluetooth, Wireless or USB Scanners
If you have a Bluetooth/Wireless or USB QR Code keyboard wedge scanner, scanning the QR code tickets will automatically trigger a search for the ticket ID on that table.
If a result is found, click on the Validate button to validate the ticket.
Validation via Windows Desktop App
From your account download the Windows Desktop App.
Install it on your computer, then log in using your account’s email address and password.
Once logged in, go to the Events page. Choose the event you want then click on Import Now. Ideally, this should be done when the ticket sales are over so that everyone’s information can be imported.
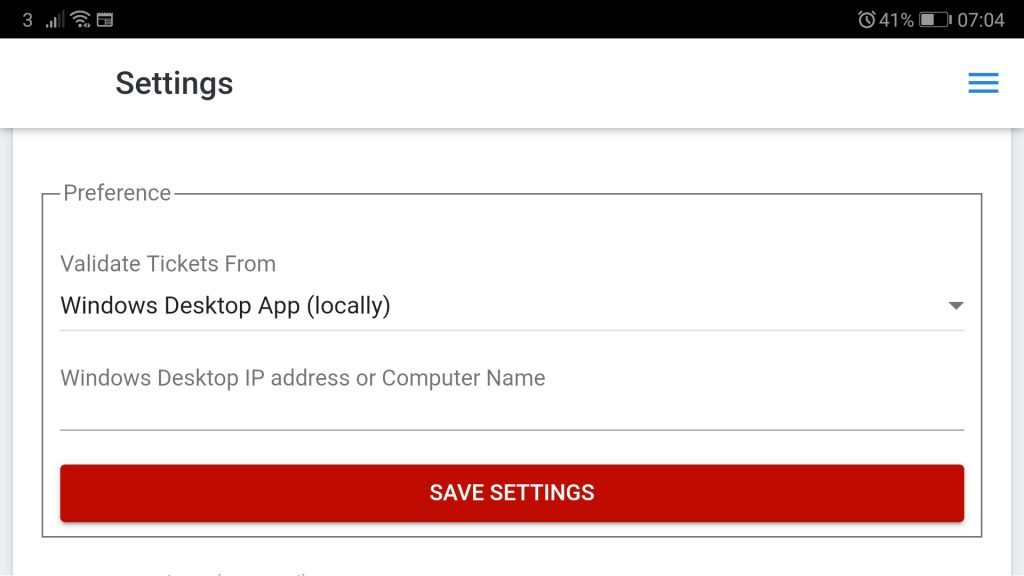
Configure the Android or iOS app to use the Windows Desktop address.
Go to Settings (swipe left), then enter the Windows Address as shown by the Windows App.
On the Windows App, go to the Smartphone Access page. Scroll down to the table, then click on Add User. These users can then log in to the smartphone app, and validate tickets.
Once all the ticket validation is complete, go to the Events page, then follow the prompts to sync the scanned data with the web app.