Knowledge Base
Creating Events
Overview
In order to sell or issue tickets, see an example, with ticketing.events, you first need to create the event.
Your event listing will be shown on three pages.
- The first page shows promotional images, a countdown, and basic event details. See an example.
- The second page shows the event’s description, venue, and optional details such as sponsors, and agenda details. See an example.
- The third page shows the tickets available for booking. See an example. The ticket reservation wizard can be embedded on other websites.
The logo and theme colors are customizable on an event’s listing pages and on the e-tickets issued. See an example.
Creating An Event
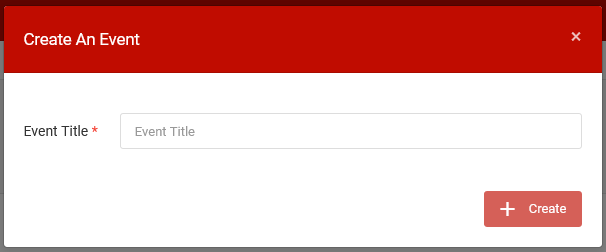
To create an event, go to the Events page.
On this page, go to the Actions > Create Event button.
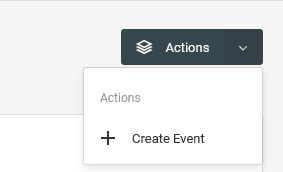
In the pop-up, enter the event’s title then click on the Create button.
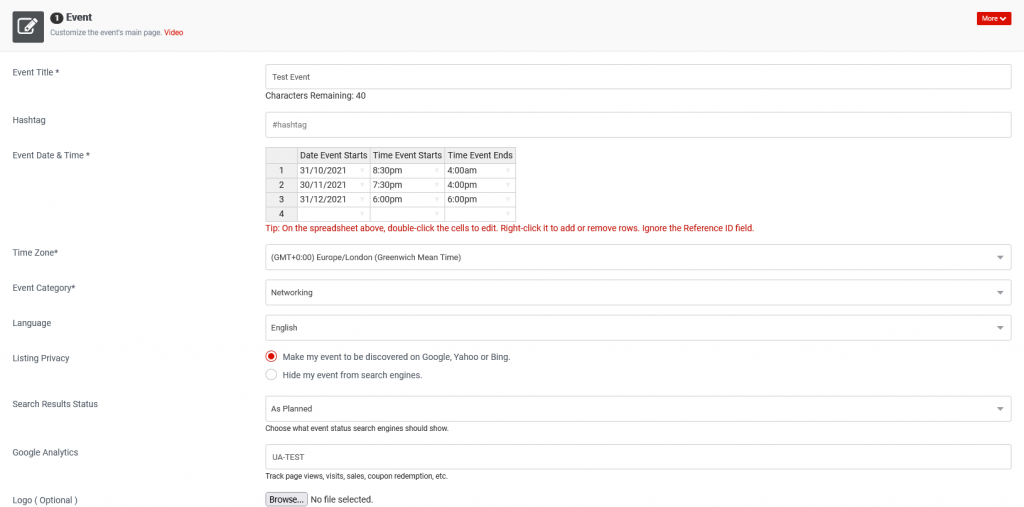
Event Dates & Time
On the new page, fill out the event’s basic details such as date, time, and timezone.
Cover Photos
Optionally, add large promotional cover photos.

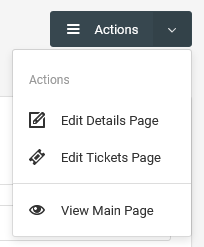
At the top of the page, go to Actions, then choose one of the edit options to continue editing other attributes of the event.
To view what the listing page looks like click on the View option.
Event Description
From the Event Details page, add an event description, and optionally a link to a Youtube or Vimeo video.

Venue Details
Under the Venue section, add your venue details, for a physical location, which will then be displayed as a map.
You can also enable What3Words to help customers share and find the venue using three memorable words.
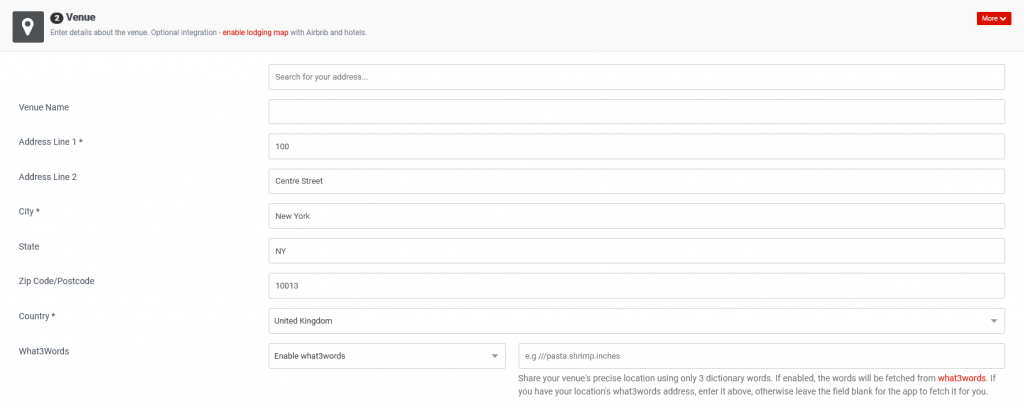
If the event spans multiple days, you can enable the lodging integration to help customers find hotels and other places to lodge.
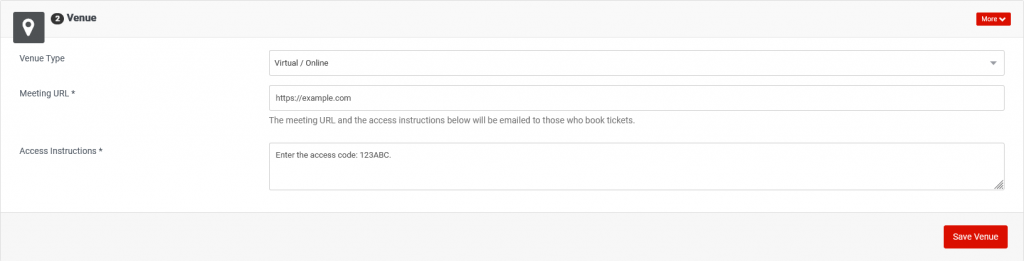
If your event is virtual (held online only), indicate it as such, then enter the meeting’s URL and access instructions.
Note – for virtual events, the e-tickets sent do not include a QR code.
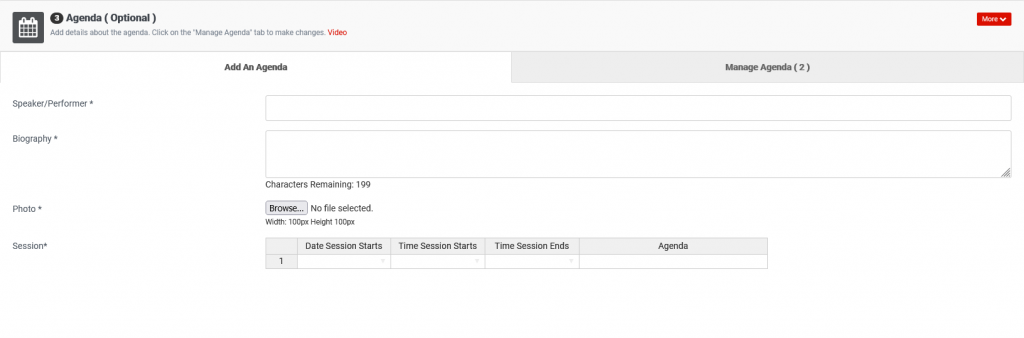
Agenda
If the event has a schedule, you can define the start and end times, etc.
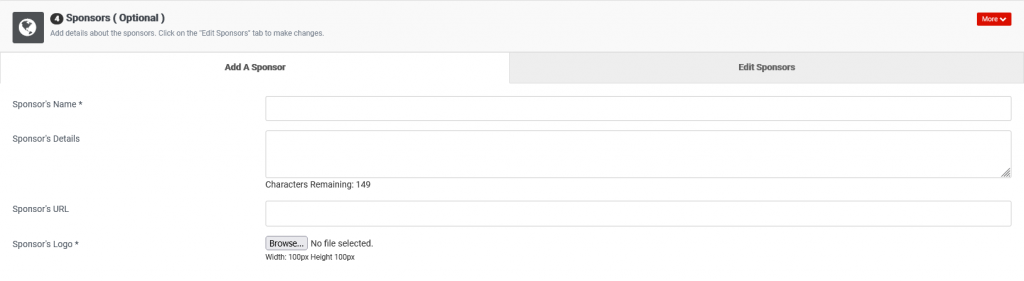
Sponsors
Add logos of the sponsors if applicable.
Tickets
From the Events Tickets page, enter details about the tickets as described here on the Managing Tickets page.

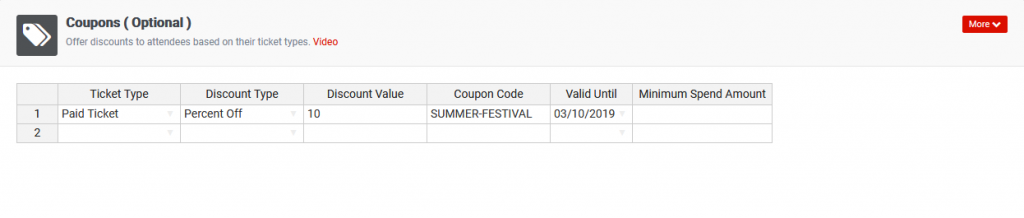
Coupons
If you are charging for the tickets, you can create various types of coupons as described here on the Managing Coupons page.
Coupons
Set up questions and answers to issues customers generally enquire or may enquire about.

Terms & Conditions
You can add your own terms and conditions for the sales of the tickets, attendance, etc.
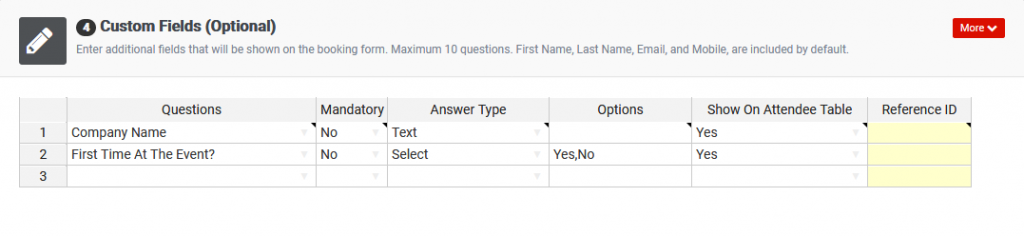
Custom Fields
You can capture more data by setting up custom form fields that should be filled out by when tickets are being booked.
Viewing The Event Page
Once you have published the event, from the Events page, go to the table and then find the event that you’re interested in.
Go to its Action menu, then click on the View Event option.

Copy the URL of the event page and share it on your promotional channels.
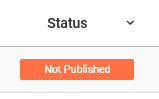
Pausing an Event
By pausing an event, you make your event page inaccessible thereby stopping ticket sales.
To pause an event, change it’s status from Live to Not Published.
From the Events page, on the events table, under the Status column, click on the Live button then follow the prompts to change it status.
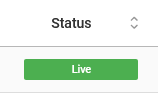
To un-pause the event simply click the Not Published button and change it to Live.