Knowledge Base
New Check-in Trigger
This Zapier integration triggers whenever a ticket has been scanned and validated.
Data in the trigger includes the ticket details, check-in time, attendee’s name, email address, and any custom fields data you have set up to be filled out by them.
Once the trigger has been executed, a Zapier action can be started to automate the use of the triggered data. For example, data can be added to a Google Sheet, a MailChimp list, etc.
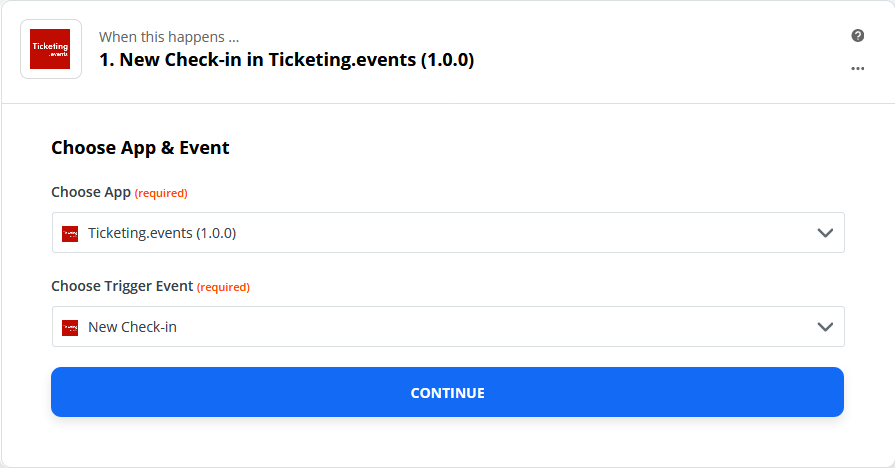
Setting up the Zap trigger
To set the New Check-in Zap trigger up, in your Zap editor, select the “New Ticket Sales in Ticketing.events”.
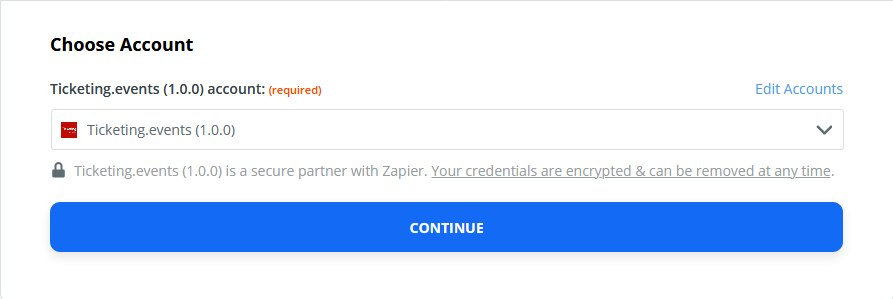
After that choose the account to authenticate with, then click on Continue.
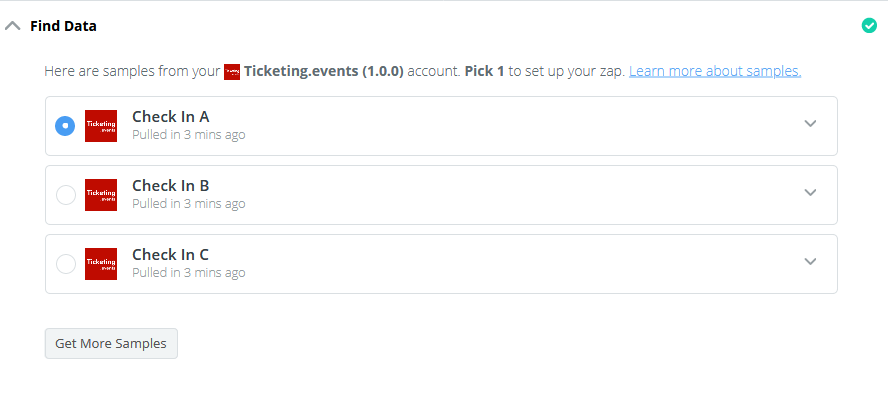
Continue to the Find Data step. On there click on the Test & Review button. Zapier will attempt to retrieve sample data from your account that matches the event.
You may, therefore, need to set up sample data within your account, if nothing was found. Simply validate an attendee’s ticket.
If Zapier finds data, you will be presented with samples to choose from.
Setting up a Zap action
At this point, you would have reached the end of the trigger setup. You now need to set up an Action i.e what should happen when the zap is triggered.
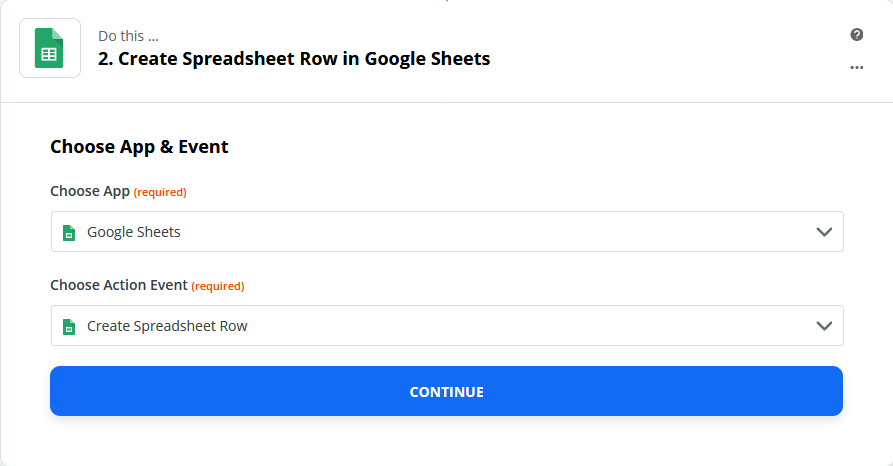
The action can be anything useful that you want. In this guide, we’ll set up an action that automatically creates a new spreadsheet row in a Google Sheet.
Click on the (+) button to add an action.

Search and choose Google Sheets. Thereafter, choose “Create Spreadsheet Row” as the Event Action.
Click on Continue, then choose the Google account to authenticate with.

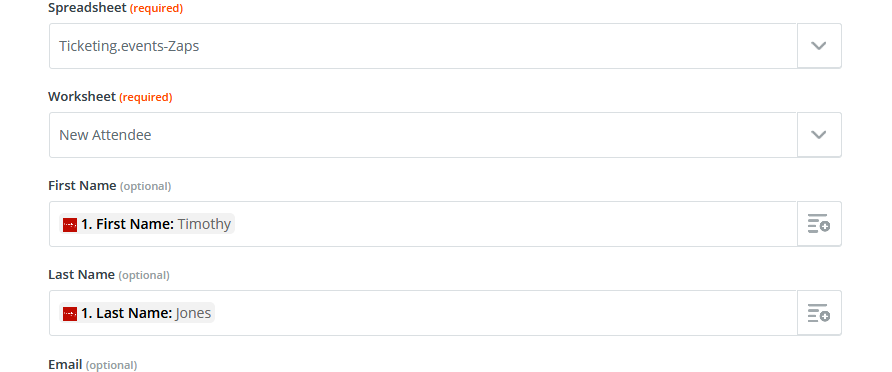
On the Customize Spreadsheet Row step, choose and enter the relevant details.
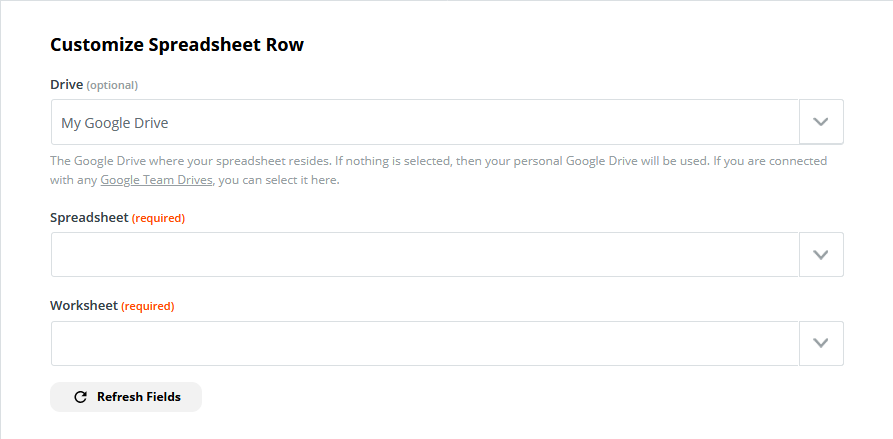
Map data from the trigger by clicking on the button at the end of the fields.
Once the customization is complete, continue to the next step to test the zap.
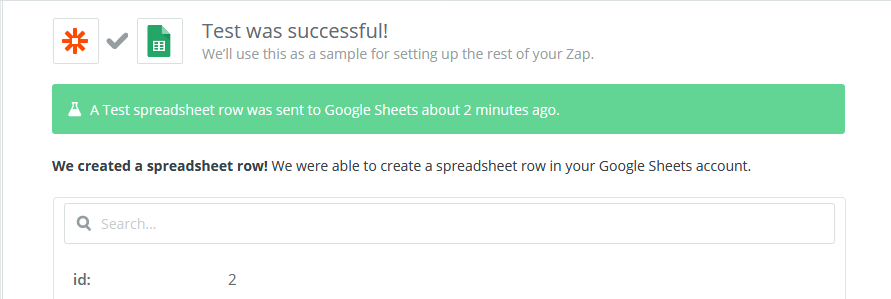
After the test is successful, you can turn the Zaps on or create further actions that meet your needs.